
How to add Scroll to Element Button to a Hostinger website
Learn how to embed Common Ninja’s Scroll to Element Button on your Hostinger website without coding.


In This Guide
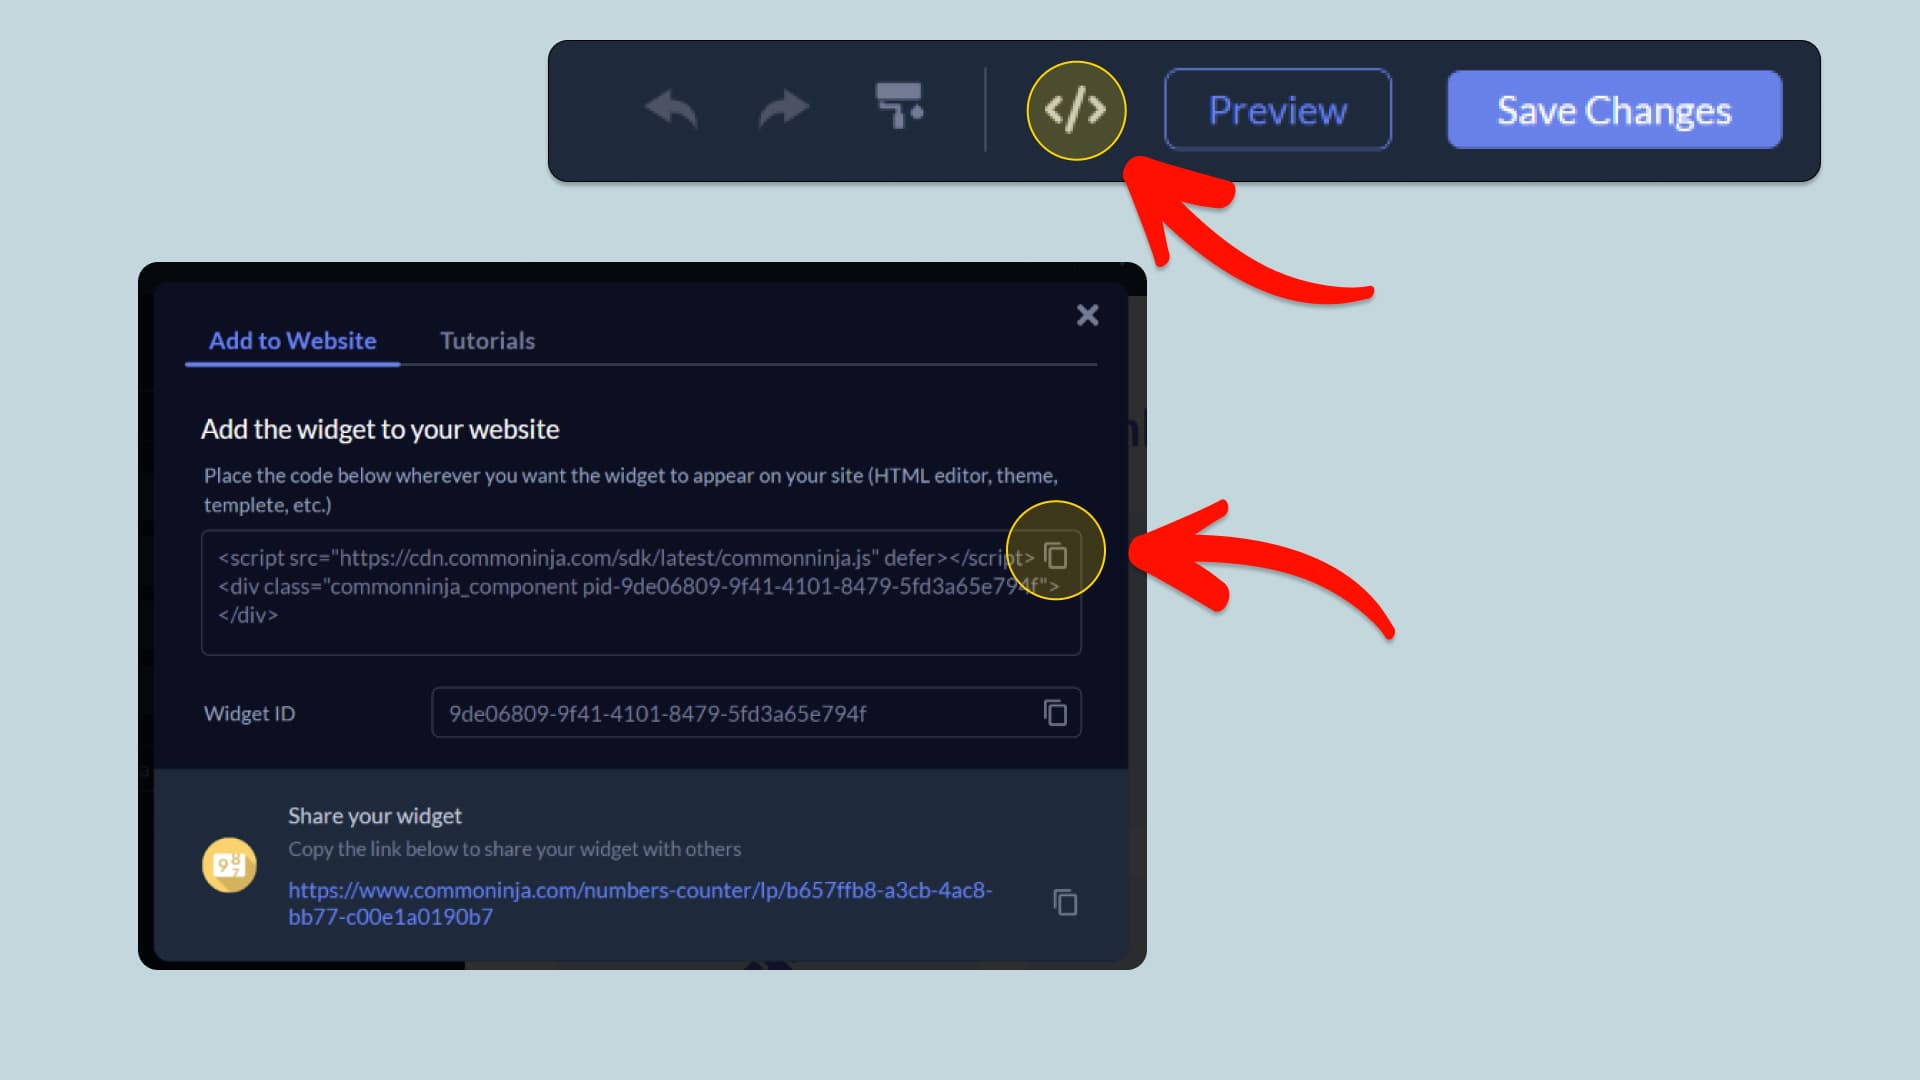
In this quick guide, you'll learn how to embed the Scroll to Element Button into your Hostinger website by generating your embed code and adding it seamlessly to your website.
Embed Scroll to Element Button on Hostinger
Why Use This Widget
Use the Scroll to Element Button widget when you want to guide visitors directly to an important section without forcing them to hunt for it. Instead of saying “see details below” and hoping people find the right spot, you place a button that scrolls smoothly to a specific block like pricing, features, FAQ, or a form. This creates a clear path from interest to action and keeps attention inside your designed flow. It is especially useful on landing pages, long sales pages, and documentation where critical information lives deeper down. By linking buttons to key sections, you remove ambiguity, highlight priorities, and make the experience feel more intentional and polished.
This tutorial was written by the Common Ninja product team, creators of interactive, no-code widgets for Hostinger website. Common Ninja helps over 500,000 users build engaging online experiences without coding.