
How to add Info List to a IONOS website
Learn how to embed Common Ninja’s Info List on your IONOS website without coding.


In This Guide
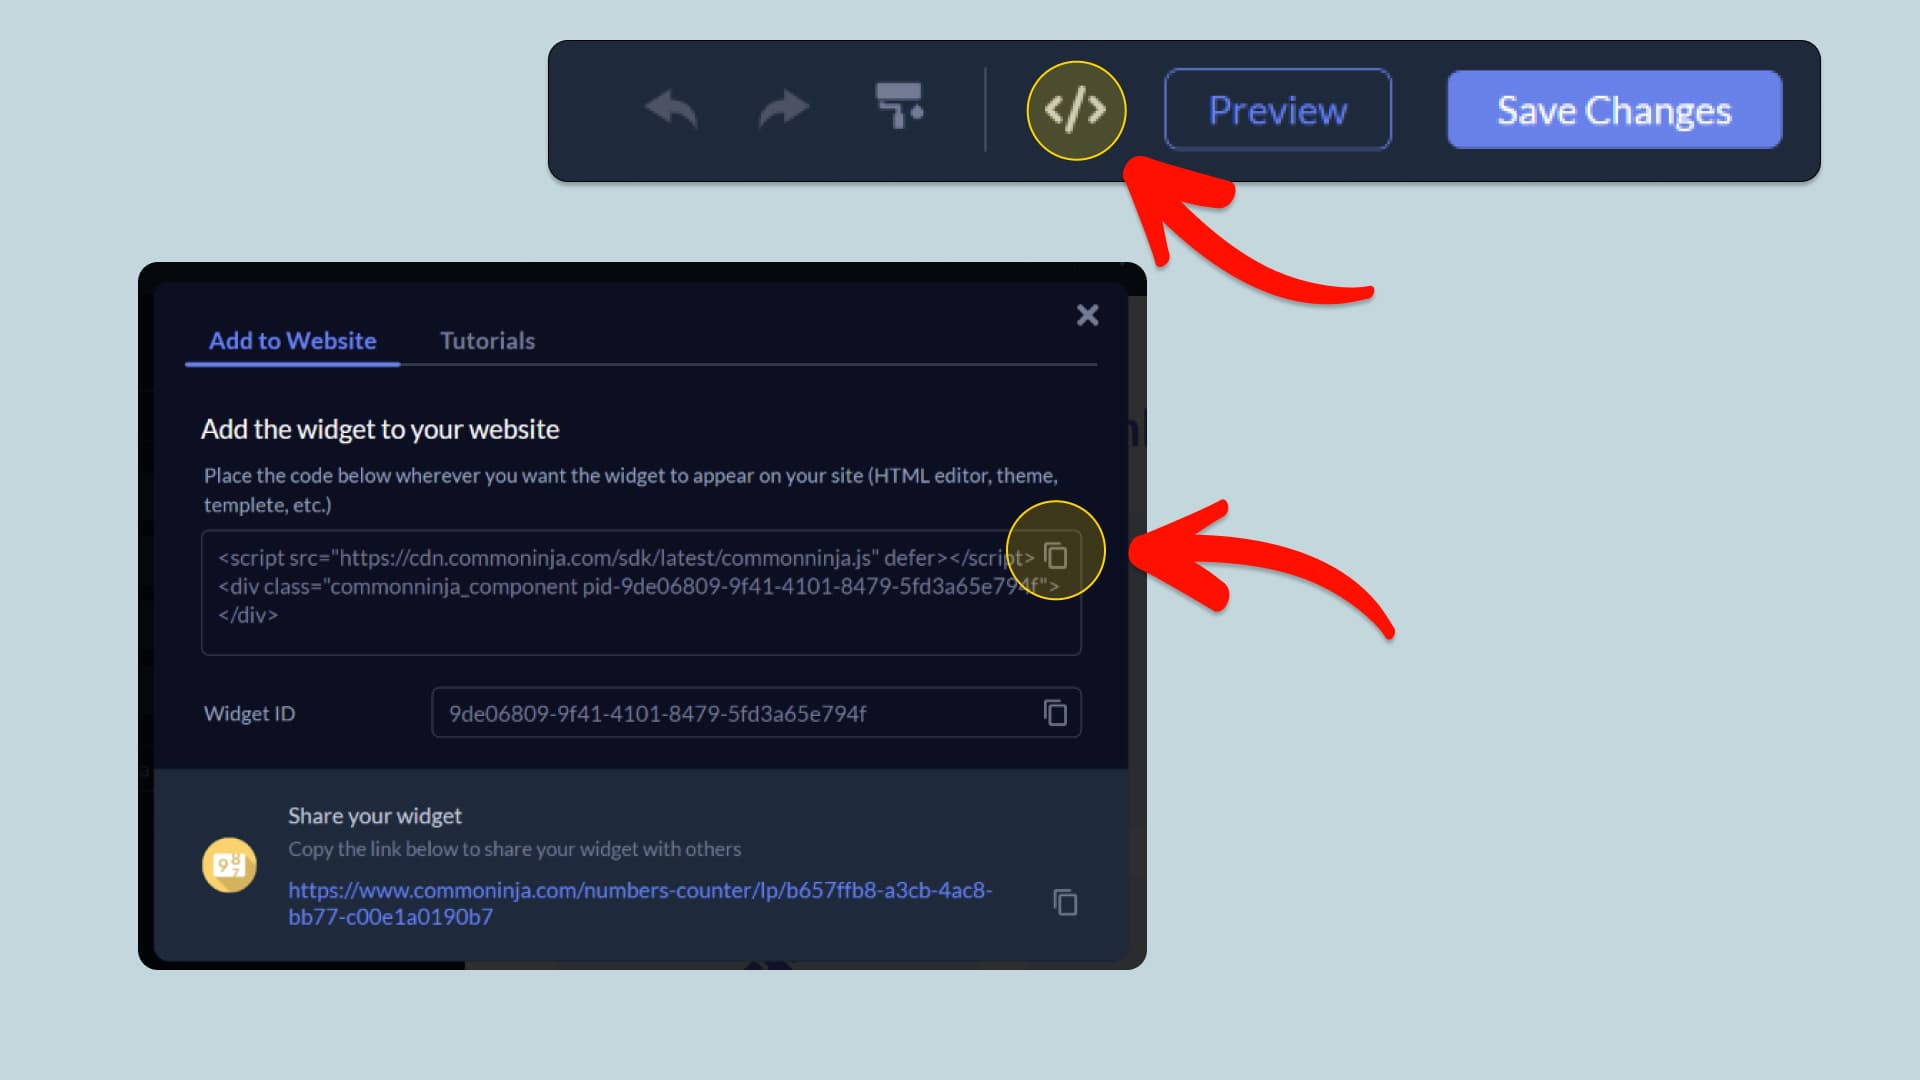
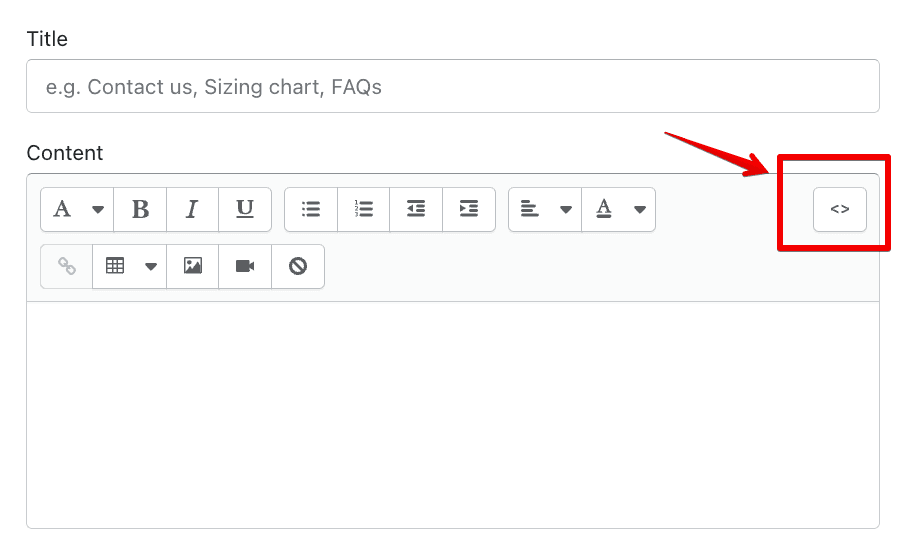
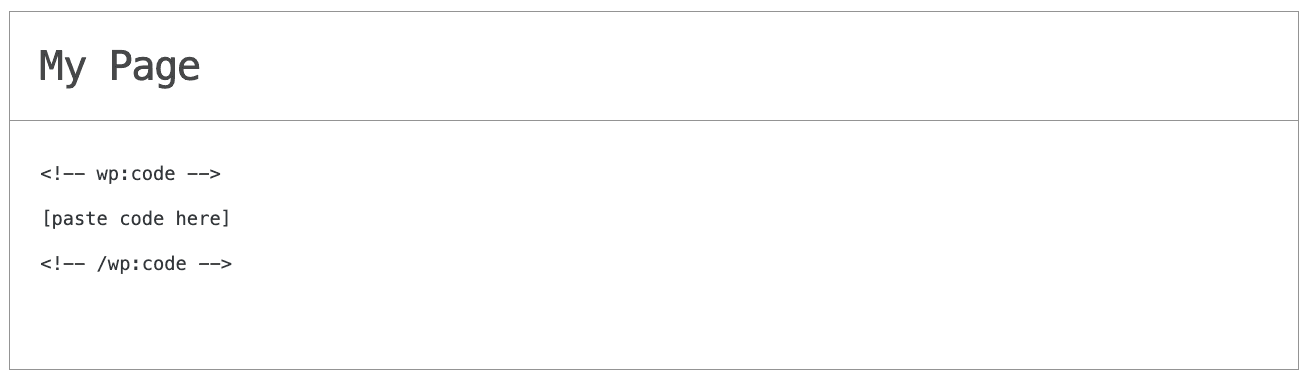
In this quick guide, you'll learn how to embed the Info List into your IONOS website by generating your embed code and adding it seamlessly to your website.
Embed Info List on IONOS
Why Use This Widget
Use the Info List widget when you need to present key facts, features, or steps in a clean structure that visitors can scan quickly. Long paragraphs often hide important details, while a designed list brings clarity through consistent spacing, titles, and optional icons or images. This makes it ideal for product highlights, service breakdowns, onboarding instructions, and any page where users compare options or look for reassurance. The format reduces cognitive load by grouping information into bite sized items, helping visitors understand your offer without effort. A well built info list keeps pages organized, improves readability on mobile, and supports stronger decisions because the core points are obvious and easy to remember.
This tutorial was written by the Common Ninja product team, creators of interactive, no-code widgets for IONOS website. Common Ninja helps over 500,000 users build engaging online experiences without coding.