


Verified review
Common Ninja has amazing no-code widgets that would beautify a website built on any builder. It is very easy to use and customise. It has as many widgets for almost everyone willing to make their website impressive.
Try the editor, no signup
Pick a template, customize it, and watch it update live, no signup.
No credit card · Free forever plan
No credit card · Free forever plan
The Common Ninja Before and After Slider is a free, no-code image comparison widget that reveals visual transformations with a draggable divider.
Upload before and after photos, pick horizontal or vertical orientation, customize labels, colors, and the slider handle, then paste one line of embed code on 200+ platforms including Canva, Wix, Tilda, Squarespace, and Google Sites.
Setup runs under 4 minutes.
Home renovations, dental work, photo retouching, weight-loss journeys, and design redesigns all have one thing in common: the transformation is the whole point. A draggable slider lets visitors feel the difference instead of reading about it.
Service businesses live or die on proof. Cleaners, painters, landscapers, restorers, photographers, and stylists win bookings when a prospect can drag through the actual outcome of their work, not a stock photo.
Skincare, cosmetics, tools, paint, restoration kits. Anything whose value lives in a visible change can be merchandised with a slider. Embed on product pages, case studies, and landing pages to lift conversion with on-page proof.
Designers, photographers, retouchers, and journalists use sliders to put process in front of outcome. Pair a final render with a wireframe, a raw photo with the finished edit, or a then-and-now archival shot for a feature story.
Drop in two photos of the same subject at different points in time. Pick a horizontal or vertical divider, set which image is the starting state, and write the two labels visitors will see on hover.
Drag-and-drop the handle style, label colors, image ratio, animation speed, and starting position of the divider in a live preview. Match the slider to your brand without writing a single line of CSS.
Copy the embed snippet and drop it anywhere on your site. Future edits to the images or labels push automatically with no need to re-embed the code.
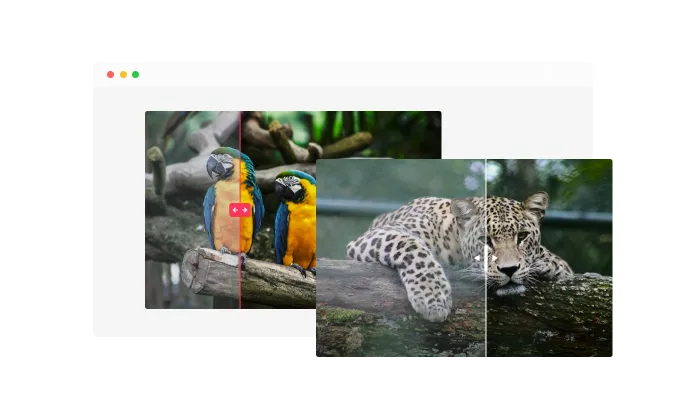
Visitors drag the divider with their cursor on desktop and their finger on touch. The handle stays responsive at every breakpoint, and you can swap the handle icon to match your brand styling.
Flip the divider 90 degrees with one click. Horizontal sliders fit wide-aspect transformations (renovations, landscapes, design layouts). Vertical sliders fit portrait shots (faces, fashion, dental, retouching).
Change the handle style, label colors, image ratio, or starting divider position and watch the slider update in real time inside the editor. No publish-and-pray cycle.
When the visual editor runs out, drop in custom CSS for any element. Build unique hover states, animation timing, or pixel-perfect spacing without touching the rest of your site.
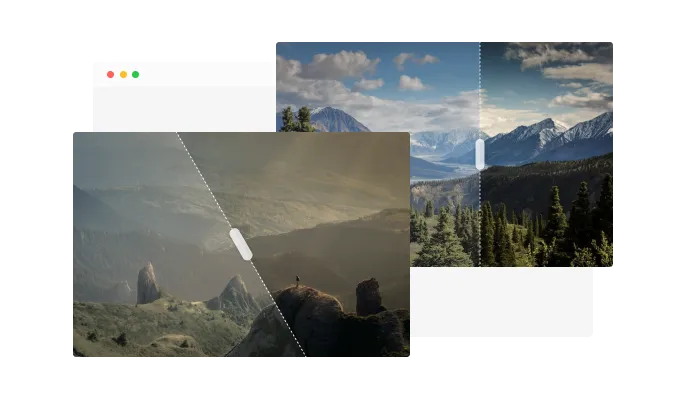
The Before & After Slider widget features the option to create horizontal or vertical sliders, enabling you to unleash the full power of your creativity. With the option to create either horizontal or vertical sliders, you'll have the flexibility to tailor your sliders to fit the needs of your project whether you're a designer, photographer, or business owner, the Before & After Slider widget is the perfect tool to help you showcase your work uniquely and engagingly.
With the Before & After Slider widget, you can create as many sliders as you desire, giving you the ability to tell a complete visual story that is tailored to your needs whether you want to showcase the progression of a construction project, the transformation of a home renovation, or the change in the appearance of a person or animal over time.
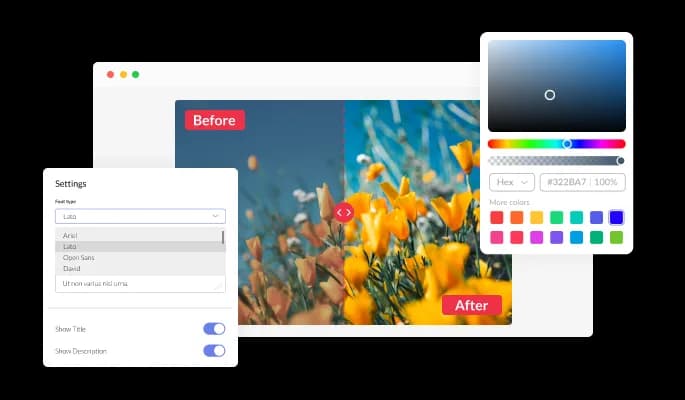
The Before & After Slider widget comes with full customization options, giving you the ability to easily edit the design to match the aesthetic of your website. You can change the colors of the slider, buttons, and labels to match your branding. You can also choose from different font options and adjust the font size, style, and color to create a cohesive and professional look. In addition to these design options, you can also customize the spacing of the widget to ensure it fits seamlessly into your website layout.
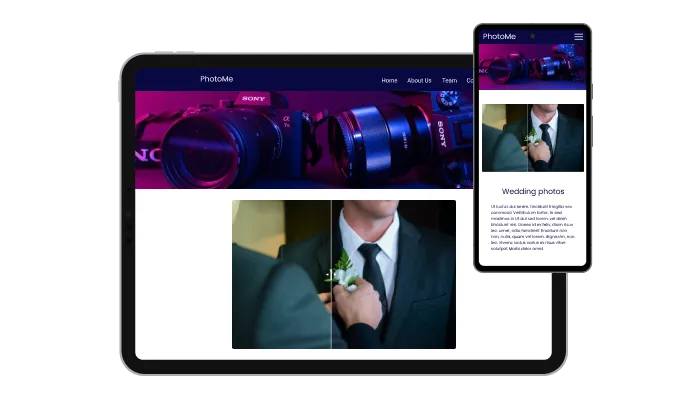
The Before & After widget is a valuable tool for any website. Not only is it fully responsive, meaning it will adjust seamlessly to fit the screen size of any device, but it also has a sleek and modern design that will enhance the overall look of your site. In a world where more and more people are accessing the internet through their phones and tablets, it is crucial to have a website that is optimized for mobile viewing. The Before & After widget will allow you to do just that, giving you an edge over competitors.

Our advanced editor is a powerful tool that gives you complete control over the appearance of the Before & After widget. With this feature, you can easily customize every aspect of the widget's look and feel, from the colors and fonts to the layout and positioning. But if you're feeling particularly creative, you can take your customization to the next level by editing the CSS directly. This gives you the ability to make even more advanced changes to the widget, allowing you to make it your own. Whether you want to make a few simple tweaks or go all out with advanced customizations, our advanced editor has you covered.

To embed the Before & After widget on your website, simply copy and paste the provided code snippet into the HTML of your webpage. Additionally, the widget is designed to be self-updating, meaning that any changes you make to the Before & After Editor will be reflected automatically on your website without the need for any additional manual updates.
The Before & After Slider widget is easy to use and requires no coding knowledge. Our intuitive dashboard with the drag-and-drop feature will enable you to customize the widget any way you’d like to with just a few simple clicks.
You have the ability to adjust the positioning of the labels on the Before and After Slider widget. This allows you to customize the location of the labels to fit best the design and layout of your website or application.
Regardless of whether your image is in the landscape, portrait, or square format, you have the ability to define the image ratio for optimal display.
Ready to put your transformation on the page?
Open the editorNo credit card · Setup in under 4 minutes
Common Ninja has amazing no-code widgets that would beautify a website built on any builder. It is very easy to use and customise. It has as many widgets for almost everyone willing to make their website impressive.
Outstanding service. I use their widgets to help me with my web design business and whenever I need help they are very quick to help.
Excellent company with excellent service!!! We used it to build a survey, it was very user friendly. The service was perfect. Amit helped us with every problem and question we had, thank you very much!!!
Common Ninja saved the day when building our website and the customer service Daniel, the co-founder and CEO, provided was amazing.
Yes. The free plan covers a single Before and After Slider widget with no time limit, no credit card, and no trial countdown. Upgrade only when you need more widgets, premium skins, or higher monthly view limits.
No. Build and customize the whole slider in a drag-and-drop editor, then paste one line of embed code into your site. Most users finish setup in under 4 minutes.
Visitors drag a vertical or horizontal divider across two overlapping images to reveal the difference. The interaction works with mouse on desktop and touch on mobile. You set both images, the labels ("Before" / "After" by default), and the starting position of the divider in the editor.
Yes. The Common Ninja Before and After Slider supports both orientations. Use a horizontal divider for wide-aspect transformations (renovations, landscapes) and a vertical divider for portrait shots (faces, fashion, retouching).
Yes. The divider is touch-first, with mouse-drag fallback on desktop. Image sizing, label placement, and the handle scale automatically across phones, tablets, and laptops. No separate mobile build required.
Yes. Both labels are fully customizable. Rename them, change the colors, set the corner position, or hide them entirely. Useful for non-English sites, branded campaigns, or before/after pairs where neutral labels read better than the defaults.
JPG, PNG, and WebP all work. For best results, upload both images at the same dimensions and aspect ratio so the divider lines up cleanly. The widget supports up to large hero-image sizes, so there's no need to downscale before upload.
200+ platforms including Canva, Wix, Tilda, Squarespace, Google Sites, WordPress, Shopify, Webflow, Bootstrap Studio, HighLevel, Hostinger, Readymag, and any custom HTML page that accepts an embed snippet.
Pick your platform. Each takes under 4 minutes.

Showcases images in a rotating or sliding manner

Add interactive areas on images that reveal extra information when clicked or hovered over.

Displays data or features side-by-side, allowing users to compare and contrast the information easily
Displays multiple logos in a scrolling or rotating manner

Showcase customer testimonials using a rotating slider

Present Google reviews for your business on your website
Yes, you can make the divider angled.
Yes, you can easily change the slider direction from within the “Content” tab.
Using the Before & After Slider widget is very easy. Simply sign up and start using the free version. There's no need to worry about complicated setup or installation processes, as the Before & After Slider widget is designed to be user-friendly and straightforward. Once you've signed up, you'll have access to all of the basic features and functions of the widget, which you can use to enhance your website and improve your online presence. From there, you can choose to upgrade to the paid version if you want to access more advanced features and capabilities. Regardless of which version you choose, you'll find that the widget is a powerful and easy-to-use tool that can help you take your online presence to the next level.
The Common Ninja Before & After Slider widget is a free tool reach with features and options. While this widget is free to use, it does have a limit on the number of views it can handle. This means that after a certain number of views, the chat button may no longer be visible or functional on your website. It is important to note that this view limit may vary depending on the plan you are using. Despite this limitation, Common Ninja's Before & After Slider is still a valuable tool for businesses looking to increase customer engagement and improve the overall user experience of their website.
The Common Ninja's Before & After Slider widget is a versatile tool for any website builder. This means that you can easily add this widget to your website or store no matter what platform you use to build your website. The Before & After Slider widget will work seamlessly with your platform whether you are using a popular website builder or something more specialized. This means you can enjoy all the benefits of this powerful tool without having to worry about compatibility issues.
It’s very easy to embed Common Ninja’s Before & After Slider widget on your website and the process consists of two steps:
The Before & After Slider widget is designed to comply with the General Data Protection Regulation (GDPR), a set of EU regulations protecting personal data and privacy. When using the Before & After Slider widget, you can be confident that it will not collect or store personal data that could violate GDPR regulations. This ensures that your business is in compliance with these regulations and can protect your customers' data privacy. Overall, the Before & After Slider widget is a secure and reliable tool that can be used to enhance your website without any concerns about GDPR compliance.
No need for coding skills. Our Before & After Slider widget is designed to be easy to use, even for those with limited technical experience. The widget features a user-friendly interface that allows you to easily customize the widget without coding knowledge. You can fully customize the Before & After Slider to match your branding. When you're done, simply copy the provided code and paste it into your website. It's that simple!
Embedding the Before & After Slider widget on your website is a straightforward process. Simply copy the provided code and paste it into the desired location on your website. The widget will seamlessly integrate into your site, allowing you to take advantage of its features and functions. No technical expertise or programming knowledge is required - just copy and paste the code to get started. This simple process allows you to easily add the widget to your website and enhance its functionality without any hassle.
Yes. We are eager to hear your request. Please refer to this page.
You might want to use a before and after slider widget on your website for several reasons.
First, a before and after slider widget can be a useful way to showcase the results of your work or products. By displaying a before and after image in a slider format, you can clearly demonstrate the improvements or changes you have made and provide tangible evidence of the value your work or products can provide.
Second, using a before and after slider widget can help improve your website's user experience by making it more interactive and engaging. By allowing your visitors to compare the before and after images in the slider, you can provide a more immersive and interactive experience that can keep visitors on your site longer and encourage them to explore more.
Third, using a before and after slider widget can help improve your website's search engine optimization (SEO). By including relevant keywords and phrases in the text and links you add to your before, and after slider, you can improve the chances that your website will appear in search results for those terms. This can help drive more website traffic and increase your visibility online.
Overall, using a before and after slider widget on your website can be a useful way to showcase the results of your work or products, improve the user experience, and boost your website's SEO.
Works on 200+ platforms. Trusted by 500K+ businesses.
Create your before and after sliderNo credit card · Setup in under 4 minutes